Tutorial: GTM GDPR-compliant Cookie Banner without Plugins
Published on | Analytics & Tracking • Data Privacy / GDPR • Website Development
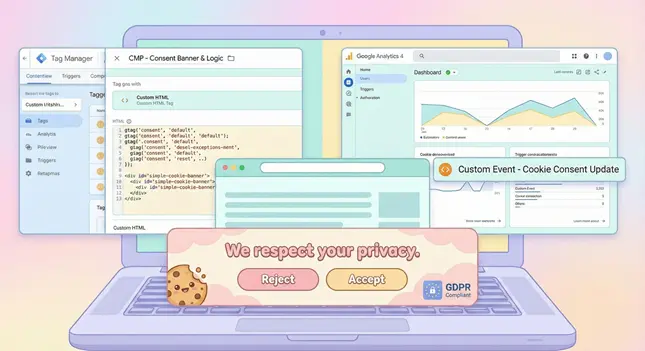
I previously used CookieBot, Complianz etc. on my Project Hotel (WordPress) website, and while it did the job, I didn’t want to rely on third-party plugins forever. I decided to go for a custom solution using only Google’s native tools. The result is a fast, compliant, and no-plugin cookie banner that gives me full control. Here is the exact code and setup I used to make it work.
Summary of My Cookie Banner’s Compliance Status
| Requirement | Status | How it’s handled |
|---|---|---|
| Prior Consent | ✅ | Default consent is set to “Denied” immediately; GA4 trigger is blocked until update. |
| Revocability | ✅ | The sticky “Cookie Settings” button allows users to change choice anytime. |
| Persistence | ✅ | localStorage remembers the choice so users aren’t asked on every page. |
| Granularity | ✅ | All Google storage types (Ad, Analytics, etc.) are mapped to the decision. |
| Zero Plugins | ✅ | 100% native GTM code. |
| Custom Styling | ✅ | CSS is isolated in a dedicated tag (no inline styles), fully responsive, and loads at “Initialization” to prevent layout shifts. |
Guide to building your GDPR-compliant cookie banner using only Google Tag Manager (GTM) and Google Analytics 4 (GA4)
This setup uses Basic Consent Mode (Strict Blocking). This means no tracking tags will fire until your visitor explicitly clicks “Accept.”
Prerequisites
- You have a Google Tag Manager account installed on your WordPress site.
- You have a Google Analytics 4 (GA4) property.
- You are logged into your GTM Workspace.
Step 1: Create the Consent Logic Tag
This script handles the banner display, saving user choices, and telling Google’s servers whether they are allowed to track data.
- Go to Tags > New.
- Click Tag Configuration and select Custom HTML.
- Name the tag:
CMP - Consent Banner & Logic. - Copy and paste the code below into the HTML box.
<script>
  window.dataLayer = window.dataLayer || [];
  function gtag(){dataLayer.push(arguments);}

  // 1. SET DEFAULTS (Deny all except security)
  gtag('consent', 'default', {
    'ad_storage': 'denied',
    'ad_user_data': 'denied',
    'ad_personalization': 'denied',
    'analytics_storage': 'denied',
    'functionality_storage': 'denied',
    'personalization_storage': 'denied',
    'security_storage': 'granted',
    'wait_for_update': 500
  });

  // 2. UI ELEMENTS (Banner + Sticky Button)

  // A. Main Banner HTML
  var bannerHTML =
    '<div id="simple-cookie-banner">' +
      '<div>' +
        '<div>' +
          '<strong>I respect your privacy.</strong><br>' +
          'I use cookies to analyze website traffic and improve your experience. Is that okay with you? ' +
          '<a href="/privacy-policy" target="_blank">Read more</a>' +
        '</div>' +
        '<div class="button-container">' +
           '<button id="btn-deny">Reject</button>' +
           '<button id="btn-accept">Accept</button>' +
        '</div>' +
      '</div>' +
    '</div>';

  // B. Sticky "Reopen" Button HTML
  var reopenBtnHTML =
    '<div id="btn-reopen-settings" style="display: none; position: fixed; bottom: 20px; left: 20px; z-index: 99998; cursor: pointer; background: #fff; padding: 10px 15px; border-radius: 20px; box-shadow: 0 2px 10px rgba(0,0,0,0.2); font-family: sans-serif; font-size: 13px; border: 1px solid #ccc; display: flex; align-items: center; gap: 8px;">' +
      '<svg width="16" height="16" viewBox="0 0 24 24" fill="none" stroke="currentColor" stroke-width="2" stroke-linecap="round" stroke-linejoin="round"><path d="M12 2a10 10 0 1 0 10 10 4 4 0 0 1-5-5 4 4 0 0 1-5-5"></path><path d="M8.5 8.5v.01"></path><path d="M16 15.5v.01"></path><path d="M12 12v.01"></path><path d="M11 17v.01"></path><path d="M7 14v.01"></path></svg>' +
      'Cookie Settings' +
    '</div>';

  // 3. LOGIC
  (function() {
    // Inject HTML
    var divBanner = document.createElement('div');
    divBanner.innerHTML = bannerHTML;
    document.body.appendChild(divBanner);

    var divBtn = document.createElement('div');
    divBtn.innerHTML = reopenBtnHTML;
    document.body.appendChild(divBtn);

    var bannerEl = document.getElementById('simple-cookie-banner');
    var reopenEl = document.getElementById('btn-reopen-settings');

    // Helper: Show Banner / Hide Button
    function showBannerUI() {
      bannerEl.style.display = 'block';
      reopenEl.style.display = 'none';
    }

    // Helper: Hide Banner / Show Button
    function hideBannerUI() {
      bannerEl.style.display = 'none';
      reopenEl.style.display = 'flex';
    }

    // Check saved consent
    var consentChoice = localStorage.getItem('cookie_consent_status');

    if (consentChoice === 'granted') {
      gtag('consent', 'update', {
        'ad_storage': 'granted',
        'ad_user_data': 'granted',
        'ad_personalization': 'granted',
        'analytics_storage': 'granted',
        'functionality_storage': 'granted',
        'personalization_storage': 'granted',
        'security_storage': 'granted'
      });
      window.dataLayer.push({'event': 'cookie_consent_update'});
      hideBannerUI(); // Show the sticky button

    } else if (consentChoice === 'denied') {
      // Defaults apply, just hide banner and show button
      hideBannerUI();
    } else {
      // New user: Show Banner, hide sticky button
      showBannerUI();
    }

    // --- EVENT LISTENERS ---

    // 1. Click "Cookie Settings" (Re-open)
    reopenEl.addEventListener('click', function() {
      showBannerUI();
    });

    // 2. Click "Accept"
    document.addEventListener('click', function(e) {
      if(e.target && e.target.id === 'btn-accept'){
        gtag('consent', 'update', {
          'ad_storage': 'granted',
          'ad_user_data': 'granted',
          'ad_personalization': 'granted',
          'analytics_storage': 'granted',
          'functionality_storage': 'granted',
          'personalization_storage': 'granted',
          'security_storage': 'granted'
        });
        localStorage.setItem('cookie_consent_status', 'granted');
        window.dataLayer.push({'event': 'cookie_consent_update'});
        hideBannerUI();
      }
    });

    // 3. Click "Reject"
    document.addEventListener('click', function(e) {
      if(e.target && e.target.id === 'btn-deny'){
        // Explicitly set to denied (in case they are switching from Granted -> Denied)
        gtag('consent', 'update', {
          'ad_storage': 'denied',
          'ad_user_data': 'denied',
          'ad_personalization': 'denied',
          'analytics_storage': 'denied',
          'functionality_storage': 'denied',
          'personalization_storage': 'denied',
          'security_storage': 'granted' // keep security granted
        });
        localStorage.setItem('cookie_consent_status', 'denied');
        hideBannerUI();
      }
    });

  })();
</script>- Triggering: Click the trigger box and select Consent Initialization – All Pages.
- Note: This is critical. It ensures the defaults are set before anything else loads.
- Click Save.
Step 2: Create the “Gatekeeper” Trigger
We need a special trigger that only fires after consent is confirmed.
- Go to Triggers > New.
- Click Trigger Configuration.
- Select Custom Event.
- Event Name:
cookie_consent_update- Note: Must match exactly (case sensitive).
- Trigger Name:
Custom Event - Cookie Consent Update. - Click Save.
Step 3: Connect Your Tags to the Trigger
Now we must tell GA4 and other page-load tags to wait for the trigger we just created.
- Open your Google Tag (your main GA4 configuration).
- Scroll to Triggering.
- Remove:
Initialization - All Pages(orAll Pages). - Add:
Custom Event - Cookie Consent Update. - Click Save.
Repeat this for any other tag that fires on page load (t.ex. if you also have a tag like “GA4 event all pages initialization” tag).
- Do NOT change event-based tags like “Add to Cart” or “Button Click”. Those are fine as they are.
Step 3 (Part 2): Add an Extra Layer of Security (Native Consent Checks)
While changing the trigger (Step 3) tells the tag when to fire, GTM has a built-in “fail-safe” feature that checks if the user has actually given permission for that specific type of tracking.
(This prevents a situation where a tag might accidentally fire due to a trigger mix-up. It ensures that a Marketing tag never fires if the user only consented to Analytics. This is good to have in place in case you decide to upgrade the cookie banner in the future to have more settings.)
- Open your Google Tag (or any other tracking tag like Facebook Pixel/Google Ads).
- Click on Advanced Settings to expand it.
- Scroll down to Consent Settings.
- Select Require additional consent for tag to fire.
- In the field that appears, type the Consent Type that matches the tag’s purpose.
Common Mappings:
- Google Analytics (GA4): Type
analytics_storage - Google Ads / Remarketing: Type
ad_storage(and oftenad_personalization) - Chat Widgets / UX Tools: Type
functionality_storage - Personalization Tools: Type
personalization_storage
For your GA4 Tag: Enter analytics_storage. Now, even if the trigger says “Go,” GTM will block the tag if the user hasn’t accepted “Analytics” cookies.
Step 4: Verify with Preview Mode
- Click Preview in the top right of GTM.
- Enter your website URL and click Connect.
- Scenario A (New User):
- The Banner should appear at the bottom.
- In the GTM Debugger, your “Google Tag” should NOT have fired yet.
- Click Accept.
- The Banner disappears.
- In the GTM Debugger, your “Google Tag” should now Fire on the event
cookie_consent_update.
- Scenario B (Returning User):
- Reload the page.
- The Banner should remain hidden.
- A small “Cookie Settings” button should appear in the bottom left.
- Your “Google Tag” should fire automatically because the script remembered your choice.
Step 5: Publish
If the preview works correctly:
- Click Submit in the top right corner.
- Add a version name (e.g., “Added Custom Cookie Banner”).
- Click Publish.
We are now live and compliant!
OPTIONAL: The Bow on Top
This is the part where we style the cookie banner to match our website better.
The Clean Method: Dedicated CSS Tag
We will create a new tag that injects a <style> block into your website’s <head> section.
Step 1: Create the Dedicated CSS Tag
- Go to Tags > New.
- Tag Configuration: Select Custom HTML.
- Name the tag:
Style - Custom Cookie Banner CSS. - Paste the following CSS into the HTML box (and edit the CSS styling to your liking):
<style>
  /* Base Banner Container */
  #simple-cookie-banner {
    position: fixed;
    bottom: 0;
    left: 0;
    right: 0;
    background: #f0f0f0; /* Light Gray Background */
    border-top: 5px solid #0090ff; /* Blue accent border */
    padding: 20px;
    box-shadow: 0 -4px 15px rgba(0, 0, 0, 0.1);
    z-index: 99999;
    font-family: Arial, sans-serif;
    font-size: 15px;
    color: #333;
  }

  /* Inner Content Alignment */
  #simple-cookie-banner > div {
    max-width: 1100px;
    margin: 0 auto;
    display: flex;
    align-items: center;
    justify-content: space-between;
    flex-wrap: wrap;
    gap: 20px;
  }

  /* Text Area */
  #simple-cookie-banner strong {
    color: #000;
  }

  /* Button Container */
  #simple-cookie-banner div[style*="display: flex;"] {
    display: flex;
    gap: 15px;
  }

  /* --- Button Styling --- */
  #simple-cookie-banner button {
    padding: 12px 25px;
    font-weight: bold;
    cursor: pointer;
    border-radius: 6px;
    transition: all 0.2s ease;
    font-size: 14px;
    min-width: 120px;
  }

  /* Reject Button (Secondary) */
  #btn-deny {
    border: 2px solid #555;
    background: #f0f0f0;
    color: #555;
  }

  #btn-deny:hover {
    background: #ddd;
  }

  /* Accept Button (Primary) */
  #btn-accept {
    border: none;
    background: #0090ff; /* Primary Blue Color */
    color: #fff;
    box-shadow: 0 2px 4px rgba(0, 0, 0, 0.2);
  }

  #btn-accept:hover {
    background: #0077e6; /* Darker Blue on Hover */
  }

  /* --- Sticky Settings Button --- */
  #btn-reopen-settings {
    position: fixed;
    bottom: 25px !important; /* Higher specificity override */
    left: 25px !important;
    z-index: 99998;
    cursor: pointer;
    background: #fff;
    padding: 10px 18px;
    border-radius: 25px;
    box-shadow: 0 4px 12px rgba(0, 0, 0, 0.2);
    font-family: Arial, sans-serif;
    font-size: 14px;
    border: 1px solid #ddd;
    display: flex;
    align-items: center;
    gap: 8px;
    transition: all 0.3s ease;
  }

  #btn-reopen-settings:hover {
    background: #f5f5f5;
  }

  /* Media query for mobile responsiveness */
  @media (max-width: 768px) {
    #simple-cookie-banner > div {
        flex-direction: column;
        align-items: stretch;
    }
    #simple-cookie-banner div[style*="display: flex;"] {
        flex-direction: column;
        gap: 10px;
    }
    #simple-cookie-banner button {
        width: 100%;
        min-width: unset;
    }
  }

</style>- Triggering: Click the trigger box and select Initialization – All Pages.
- Why Initialization? CSS should load as early as possible so the banner doesn’t appear unstyled (FOUC). This tag has no tracking function, so it’s safe to fire early.
- Click Save.
Step 2: Update the Consent Logic Tag
Now you need to remove ALL the inline style="..." attributes from the CMP - Consent Banner & Logic tag.
- Open the
CMP - Consent Banner & LogicCustom HTML Tag. - Find the
bannerHTMLandreopenBtnHTMLvariables. - Delete every
style="..."attribute from the HTML strings, leaving only the structural HTML and IDs.
The resulting CMP - Consent Banner & Logic code should look like this:
<script>
  window.dataLayer = window.dataLayer || [];
  function gtag(){dataLayer.push(arguments);}

  // 1. SET DEFAULTS
  gtag('consent', 'default', {
    'ad_storage': 'denied',
    'ad_user_data': 'denied',
    'ad_personalization': 'denied',
    'analytics_storage': 'denied',
    'functionality_storage': 'denied',
    'personalization_storage': 'denied',
    'security_storage': 'granted',
    'wait_for_update': 500
  });

  // 2. UI ELEMENTS
  var bannerHTML =
    '<div id="simple-cookie-banner">' +
      '<div>' +
        '<div>' +
          '<strong>I respect your privacy.</strong><br>' +
          'I use cookies to analyze website traffic and improve your experience. Is that okay with you? ' +
          '<a href="/privacy-policy" target="_blank">Read more</a>' +
        '</div>' +
        '<div class="button-container">' +
           '<button id="btn-deny">Reject</button>' +
           '<button id="btn-accept">Accept</button>' +
        '</div>' +
      '</div>' +
    '</div>';

  var reopenBtnHTML =
    '<div id="btn-reopen-settings">' +
      '<svg width="16" height="16" viewBox="0 0 24 24" fill="none" stroke="currentColor" stroke-width="2" stroke-linecap="round" stroke-linejoin="round"><path d="M12 2a10 10 0 1 0 10 10 4 4 0 0 1-5-5 4 4 0 0 1-5-5"></path><path d="M8.5 8.5v.01"></path><path d="M16 15.5v.01"></path><path d="M12 12v.01"></path><path d="M11 17v.01"></path><path d="M7 14v.01"></path></svg>' +
      'Cookie Settings' +
    '</div>';

  // 3. LOGIC (No changes to logic needed)
  (function() {
    var divBanner = document.createElement('div');
    divBanner.innerHTML = bannerHTML;
    document.body.appendChild(divBanner);

    var divBtn = document.createElement('div');
    divBtn.innerHTML = reopenBtnHTML;
    document.body.appendChild(divBtn);

    var bannerEl = document.getElementById('simple-cookie-banner');
    var reopenEl = document.getElementById('btn-reopen-settings');

    function showBannerUI() {
      bannerEl.style.display = 'block';
      reopenEl.style.display = 'none';
    }

    function hideBannerUI() {
      bannerEl.style.display = 'none';
      reopenEl.style.display = 'flex';
    }

    var consentChoice = localStorage.getItem('cookie_consent_status');

    if (consentChoice === 'granted') {
      gtag('consent', 'update', {
        'ad_storage': 'granted',
        'ad_user_data': 'granted',
        'ad_personalization': 'granted',
        'analytics_storage': 'granted',
        'functionality_storage': 'granted',
        'personalization_storage': 'granted',
        'security_storage': 'granted'
      });
      window.dataLayer.push({'event': 'cookie_consent_update'});
      hideBannerUI();

    } else if (consentChoice === 'denied') {
      hideBannerUI();
    } else {
      showBannerUI();
    }

    reopenEl.addEventListener('click', function() {
      showBannerUI();
    });

    document.addEventListener('click', function(e) {
      if(e.target && e.target.id === 'btn-accept'){
        gtag('consent', 'update', {
          'ad_storage': 'granted',
          'ad_user_data': 'granted',
          'ad_personalization': 'granted',
          'analytics_storage': 'granted',
          'functionality_storage': 'granted',
          'personalization_storage': 'granted',
          'security_storage': 'granted'
        });
        localStorage.setItem('cookie_consent_status', 'granted');
        window.dataLayer.push({'event': 'cookie_consent_update'});
        hideBannerUI();
      }
    });

    document.addEventListener('click', function(e) {
      if(e.target && e.target.id === 'btn-deny'){
        gtag('consent', 'update', {
          'ad_storage': 'denied',
          'ad_user_data': 'denied',
          'ad_personalization': 'denied',
          'analytics_storage': 'denied',
          'functionality_storage': 'denied',
          'personalization_storage': 'denied',
          'security_storage': 'granted'
        });
        localStorage.setItem('cookie_consent_status', 'denied');
        hideBannerUI();
      }
    });
  })();
</script>
You can now adjust any color, font, or layout by editing only the Style - Custom Cookie Banner CSS tag.
Check out my custom cookie banner live on my [Project Hotel] website!
Update 2025-12-18:
It’s now also live on both my portfolio websites, with some small upgrades and visual changes. Check the look on my [GitHub Page].